1 - Preface
RoboMaster TT is the first open-source educational drone from DJI. For making this drone more in conformity with the spirit of open-source and getting close to the core of Youth Science & Technology Innovation Education, DJI has officially cooperated in-depth with DFRobot, a leading international open-source hardware company, to combine its RoboMaster TT with DFRobot graphical programming software Mind+, aiming to bring professional educational solutions and tools for teachers and students. Mind+ is designated as the official graphical programming software platform for this drone.
Moreover, since Mind+ supports an extensive range of hardware libraries and user-defined extension library function, DFRobot's open-source hardware products are also recommended as the third-party external hardware for RoboMaster TT, which enables several advances for this drone.
2 - RoboMaster TT
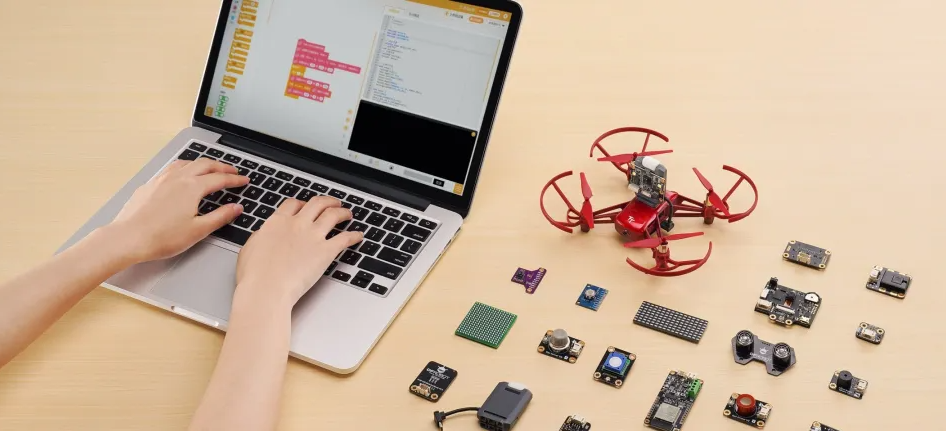
RoboMaster TT consists of two parts:
- The bottom part is the Tello EDU drone that performs the flying command.
- The top part is the extension module equipped with ESP32 main-controller and 5.8G WIFI module.
Connect the two parts with a micro USB cable, activate the WIFI module for communication.

3 - Mind+
Mind+ can control Tello EDU in real-time via WIFI on a computer or program the ESP32 controller on the extension module to operate Tello EDU.
Therefore, there are four ways to play with RoboMaster TT on Mind+:
- Online Mode —— Single-Player Mode
- Online Mode —— Multi-Players Mode
- Offline Mode —— ArduinoC Programming
- Offline Mode—— MicroPython Programming
>3.1 - Online Mode VS Offline Mode
In Mind +, if the program runs on the computer immediately after programming, it is Online mode programming. In contrast, if the program needs to be uploaded to the third-party hardware to run after programming, and it is Offline mode programming.
Therefore, for RoboMaster TT, under Online mode, it can be directly programmed and controlled in real-time when connected with the WIFI in your computer. Once the WIFI disconnected, the set program will not be executed. In Offline mode, you need to connect the ESP32 on the extension module to your computer with a USB cable, then download the program into the ESP32 chip. The drone can still perform the set program when disconnected.
>3.2 - Video Tutorial
Click to watch the complete video
4 - Preparation
Before using, adjust the drone to the latest default status to better realize the effects described in this document.
>4.1 - Update Tello EDU Firmware
Please use DJI official Tello EDU mobile APP to update the firmware to the latest version according to the Tello EDU Instruction.
Note: do not connect the extension module when updating EDU firmware, that is, the WIFI name should be Tello-xxxx.
>4.2 - Install Driver
The extension module is programmed on Mind+ by USB port, so you need to install driver when using Mind+ to connect the extension module for the first time.
- Connect the extension module to a computer with a USB cable.
- Open Mind+, click "install serialport driver" in "Connect Device" on the menu bar. The driver installation box will pop up, click next or OK to complete it.
- If there are any problems during installation, click the link to check the detailed steps: https://mindplus.dfrobot.com.cn/zhunbei

>4.3 - Restore Extension Module Firmware
Since the extension module is programmable, if it already has codes inside, then in Online mode, the program wrote for controlling the drone will not work. Thus, it is necessary to reset the extension module to default.
- Connect the extension module to a computer via USB cable.
- Switch Mind+ to Online mode, Click "Extensions" at the lower-left corner, select RoboMaster TT(ESP32) in Board, and back to the main interface.
- Select the corresponding COM at "Connect Device", then click "Restore device initial settings". When completed, the LED matrix on the extension module will show "TT".

5 - Play in Online Mode
This part briefly introduces the basic ways to play RoboMaster TT under Mind+ Online mode.
Note: it is compatible with parts of functions of Tello EDU except the extension module, such as LED matrix control.
>5.1 - Single-Player Mode

Preparation
- PC with WIFI card function
- Tello EDU or RoboMaster TT
- RoboMaster TT firmware needs to be restored to the default
- Turn RoboMaster TT to AP mode to allow your computer to connect the WIFI from Tello EDU

Control
-
Open Mind+, switch to "Online Mode", click "Extensions"->"Function"->"RoboMaster TT(Stand-alone)", then back to the main interface.

-
Connect the WIFI named as RMTT-xxx or Tello-xxx.
Note:
- WiFi RMTT means that the extension module is added onto the Tello EDU, WiFi Tello means the opposite. Both of them can be connected.
- If there is no WiFi Tello-xxx or RMTT-xxx, you can manually find and connect it on the WiFi list of your computer.
- If the WiFi Tello-xxx or RMTT-xxx cannot be found on your computer WiFi list, then the drone WiFi may not be switched to AP mode or the WiFi name has been revised. Now check the extension module switch, and long-press the ON/OFF button of Tello EDU to reset WiFi name.
- If the WiFi disconnected automatically a few seconds later after a successful connection, then it means that Mind+ networking function is blocked by the computer firewall, now please turn off the firewall.
- For other questions, please refer to the FAQ at the end of this article.

-
When connected successfully, a green tick will appear in the box marked below with red. The drone indicator flashes in purple (RMTT) or green(Tello EDU), which means all works fine, now you can program to control it.

-
To begin with, turn on the real-time display of battery power and drone temperature. When the battery power is not enough, then the drone flipping command will not be executed. If the temperature is too high, it will auto shut down.

-
Click the block or drag out the block to the editing section, the related command will be executed. In the "propeller start mode", the propellers spin without flying the drone, which enables to cool the drone when landed on the ground. The drone should exit the "propeller start mode" before taking off.

-
Program Test. Put the drone in an open space.
Note: each program waits until the action is executed before moving to the next command, also, blocking command.

Block Description
- 【Click to view the block description】
- For more details, please refer to the Tello EDU SDK Document.
>5.2 - Multi-Player Mode
Connect multiple drones and a PC to the same router, then the computer can send commands to different drones to realize multi-drones control.

Preparation
- All requirements in Single-Player Mode
- Wireless Router
Drone Setup
First of all, we have to record the SN code or WiFi name of the drone. It can be found in Tello EDU battery holder, mobile APP, product package box, or single-player mode. Here we will show you how to get drone SN code via Mind+.
- First set the single-player mode(also stand-alone mode), then the SN code can be get by using the block "Tello SN code". Record the SN code.

Then, connect the drone into the Route WiFi:
Note: a quality network is required for the multi-players mode. So it is recommended to use a dedicated router to let the computer and drone access 5.8G WiFi, and disable other network cards in the computer.
-
Set the router WiFi the drone will connect to. The following block will be used. Fill in the WiFi name and password, then click to run.

-
Turn the switch on the RMTT extension module to STA mode. Wait for the drone to connect to the WiFi. It will automatically enter "propeller start mode" when connected.
We can also check if the drone is connected to the WiFi through the router background.

Follow the steps above to record SN code of each drone and get them connected to the WiFi.
Drone Control
Load the RoboMaster TT(team) blocks. Do not mix block of two modes in use.

To better control multiple drones, we can number all drones using the related block. As shown below, input the drone SN codes and number them as 1 and 2. Then scan drones in the computer network.
Turn on the drone that has switched to STA mode, wait for the drone to connect to the WiFi, and then its propellers will automatically start spinning. Run the program below to search for the drone. When the drone's indicator changes from yellow to purple, the drone is found.
Note:
-
At this time, the computer needs to be connected to the same router as the drone, otherwise, the drone cannot be found.
-
If it fails, refer to the FAQ at the end of this article.

Check the drone status.

Multi-Drones flying test.

Block Description
- 【Click to view the block description】
- For more details, please refer to the Tello EDU SDK Document.
6 - Play in Offline Mode
This chapter will mainly show you how to program RMTT extension module under Mind+ Offline mode.
RoboMaster TT is equipped with an ESP32 chip the as main-controller. Mind+ supports two programming languages: ArduinoC and MicroPython. The former has more functions and its extension functions are more suitable for beginners while the latter has less function relatively, but is a good choice for users who want to learn Python.
>6.1 - ArduinoC Programming
Preparation
- PC
- micro USB Cable
- RMTT Extension Module
Start to Control
- Switch Mind+ to Offline mode. Select RoboMaster TT(ESP32) in Extension->Board. Connect the extension module to your computer with USB cable.

-
Write a simple blink program, select COM port at Connect Device, click Upload, then see the result.

-
Flight control. Write a fly program, disconnect the USB cable when the program is uploaded. Connect the extension module to the Tello EDU drone, then turn it on.
-
Wait for the drone indicator to light up in green, then press the button on the extension module(Drone guard system, the drone will fly only when "Fly control" block is used after pressing the button). Then the light color changes to red, the drone starts flying. Blue for hovering, green for landing.

Coding Manually
You can directly write code into Mind+ for compiling and uploading. Especially for sensors that Mind+ does not support currently, you can input code manually onto Mind+ to control them.
Please note that when click "Upload", if the code input area is in Auto Generate mode, then the program uploaded is the corresponding graphical code. Normally, the two can coexist without conflicts,
For example, read the external URM10(SR04) ultrasonic sensor by manually editing.

User Extension Library
Mind+ extension library is opened, so users can import external Arduino library by this function, and program manually or design their graphical blocks to control.
For more details, please refer to Mind+ User-defined Library Tutorial.
Block Description
- 【Click to view the block description】
- For more details, please refer to the Tello EDU SDK Document.
>6.2 - MicroPython Programming
Preparation
- PC
- micro USB Cable
- RMTT Extension Module
Start to Control
- Switch Mind+ to Offline Mode, select RoboMaster TT(ESP32) in Extension->Board. Connect the extension module to your computer with USB cable.

-
Switch the coding language to MicroPython. The codes will be turned to MicroPython syntax. Select COM port at the "Connect Device", then the MicroPython firmware will be burned automatically.

-
Write a program to switch light color, click Run to check the result. Since the compilation process is omitted in the MicroPython mode, the program uploading speed is faster.

Block Description
- 【Click to view the block description】
- For more details, please refer to the Tello EDU SDK Document.
>6.3 - Tutorial: IR Remote Controlled Drone
Mind+ supports a large number of open-source hardware, so users can connect various components to RMTT to realize all kinds of effects.
This tutorial will be using an IR receiver module to control the RMTT drone.
Preparation
- PC
- micro USB Cable
- RMTT Extension Module + IO Expansion Board
- IR Receiver Module
- IR Remote Controller
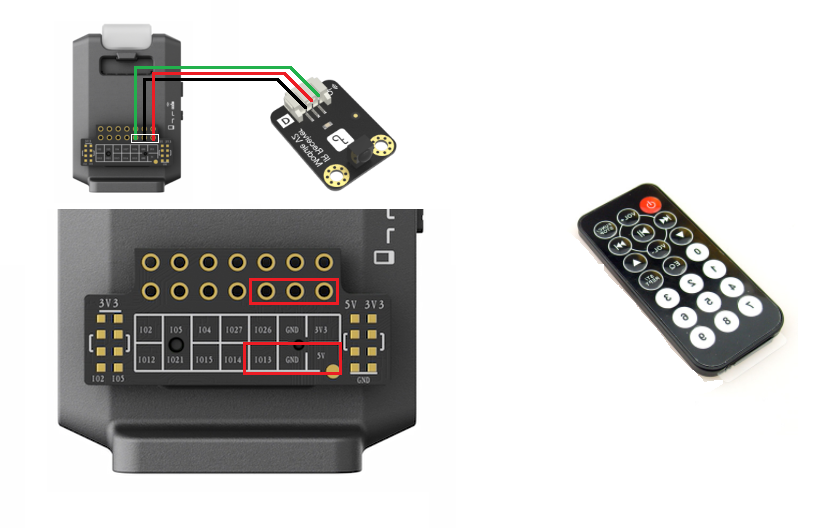
Hardware Connection
- Connect the IR receiver module to IO13 (set in the program) via the IO expansion board.
Software Programming
-
Open Mind+(1.6.5 RC2.0 and above), switch to Offline Mode, select board RMTT, then load IR receiver module in Communication, back to the main interface.

-
Write a program to get IR code from serial port:

-
When uploading is done, open the serial monitor, use the IR remote controller to send data to the IR receiver module:
- When different buttons are pressed, different codes will be received. These are the IR codes.
- For this remote controller, only the code starting with FD is correct. Others are wrong codes(interfered); For other remote controllers, press the same key multiple times, the repeated value is the corresponding key number.

-
Control the drone via these codes. Write a program as shown below. Control the light color of RMTT extension module. Press 2, light up in blue; 5, green.

Video Demo: Click to watch
Advanced Extension
- The tutorial above mainly demonstrated how to use IR remote controller to control RMTT light. Revise the program, then it can control the movement of the drone.
- For other open-source hardware, you can still use the same steps to program and control the RMTT.
- If the module you used is not supported by Mind+ currently, you can use Mind+ User Extension Library to load user library.
More Tutorials
**Click to view: ** ROBOMASTER TT Drone Programming Teaching Development Competition
7 - FAQ
| Q1. | Can the Tello Non-RMTT version be programmed on Mind+? |
| Common versions are not supported. EDU version can be used under Online mode +Team Control function. For RMTT version, all functions are available including in Offline mode. |
| Q2 | Cannot find WiFi or Tello EDU under Online Mode, or WiFi disconnects immediately after a successful connection. |
| First, make sure your computer and drone are in the same network, and drone firmware are all in the latest version. | |
| S1 | Turn off the network card and restart the computer. If the device cannot be found, please disable all network cards except the one you have to use, then restart the computer and search. It is recommended to use Windows 10. |
| S2 | Disable the firewall. Firewalls have an impact on network connection, disable the Windows firewall in the control panel. |
| Q3 | Failed to access port 8889, what should I do? |
Click the block "disconnect" in team mode, or restart the software, reduce the number of scanning operations. If it still cannot be solved, give us feedback via email. |
| Q4 | Why there is a big delay when doing the actions in team mode? |
| In team mode, please use the dedicated router and make sure all drones and your computer are accessed to the router 5.8G WiFi instead of 2.4G WiFi (If your router has channel setting function, you can set 5G channel to 149). |
| Q5 | I can only find the WiFi starting with Tello, but not WiFi RMTT-XXX, why is that? |
| First of all, please make sure the extension module is connected to the Tello EDU before starting it, and dial the switch on that module downward(mobile symbol side). Then, since the extension module WiFi is default to 5GHz, you have to check if your mobile phone or PC supports 5GHz. If not, you can revise the channel of the module in this way: get a phone that can connect to RMTT, turn on the Tello EDU, set the communication channel to 1-13(2.4G band) in the external module. Run program then the 2.4G mobile phone can be used. |
| Q6 | How can I fix a sensor onto RMTT? |
3D print a component to fix it: click to download 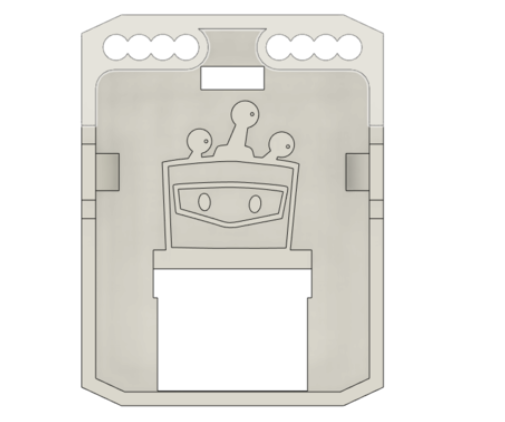 |
| Q7 | What is the I2C pin of the RMTT extension board? |
| SDA:IO27 , SCL:IO26 |